Arduino weather station with telegram bot
A month ago I became a father, so I had to switch to a different kind of “releases” (diapers, afternoon baths, feeding bottles…) but also I managed to find some time to carry out some ideas I had in mind since the pregancy news (although it was barely an excuse to dig into arduino’s world, which I’ve keen on to give it a go since a while ago :P).
The very first idea was a simple one: a mini weather station I will place in my son’s bedroom to monitor humidity and temperature, with Telegram bot support for alerting and querying metrics. Lately I decided to server a brief html page to be able to show it on my TV, laptop or mobile devices connected to the same wifi network.
Let’s start!
Requirements
To build this system, you will need at least:
- Arduino board (this code was tested on WEMOS D1 R1 and WEMOS D1 mini, but any Arduino will do it)
- DHT 22. If you have a DHT 11 bare in mind it will work (change
DHTTYPEto DHT11), but the accuracy is not the same (I really encourage DHT 22, I also tried out DHT 11 but the result was not that good). - Some wires, and probably a protoboard to easily connect everything.
Prerequisites
Flash your Arduino board with your favourite flavor, and prepare your Arduino IDE with the following libraries:
If you need extra libraries (all the others came preinstalled on my flash) just add them using the Libary manager.
Some issues I found out during the development, that might affect you as well:
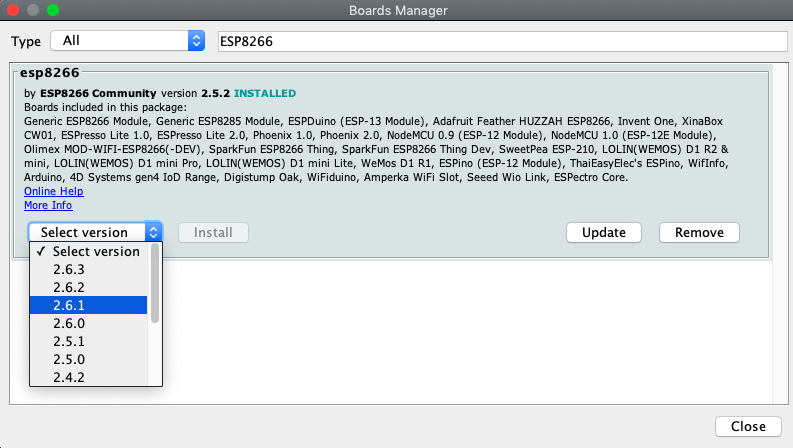
- For my WEMOS boards, I had to install ESP8266 board version 2.5.2 instead of latest 2.6.3, otherwise Telegram Bot won’t work. See image below.
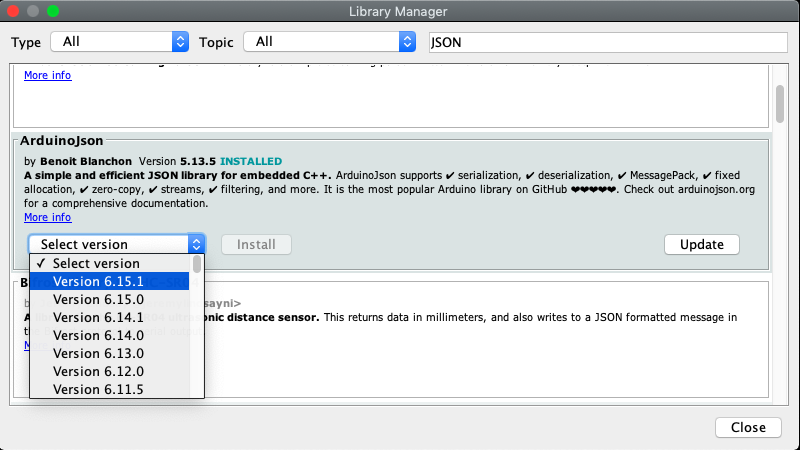
- Another issue was some sort of JSON buffer error, to avoid them I had to downgrade ArduinoJSON library to 5.13.5 (latest version 6.15.1 at this time). The reason can be found here. See image below.
Initialize telegram bot
If this is your first time working with a telegram bot, see Telegram Bot tutorial for more info. What I did was the following:
- Open a chat with @BotFather (telegram bot manager)
- Create a new bot with /newbot command. Provide a name, copy the token for later.
- Configure yout bot to allow direct messages. Type /setprivacy, choose your bot name and pick up ‘Disable’ option.
Pinout
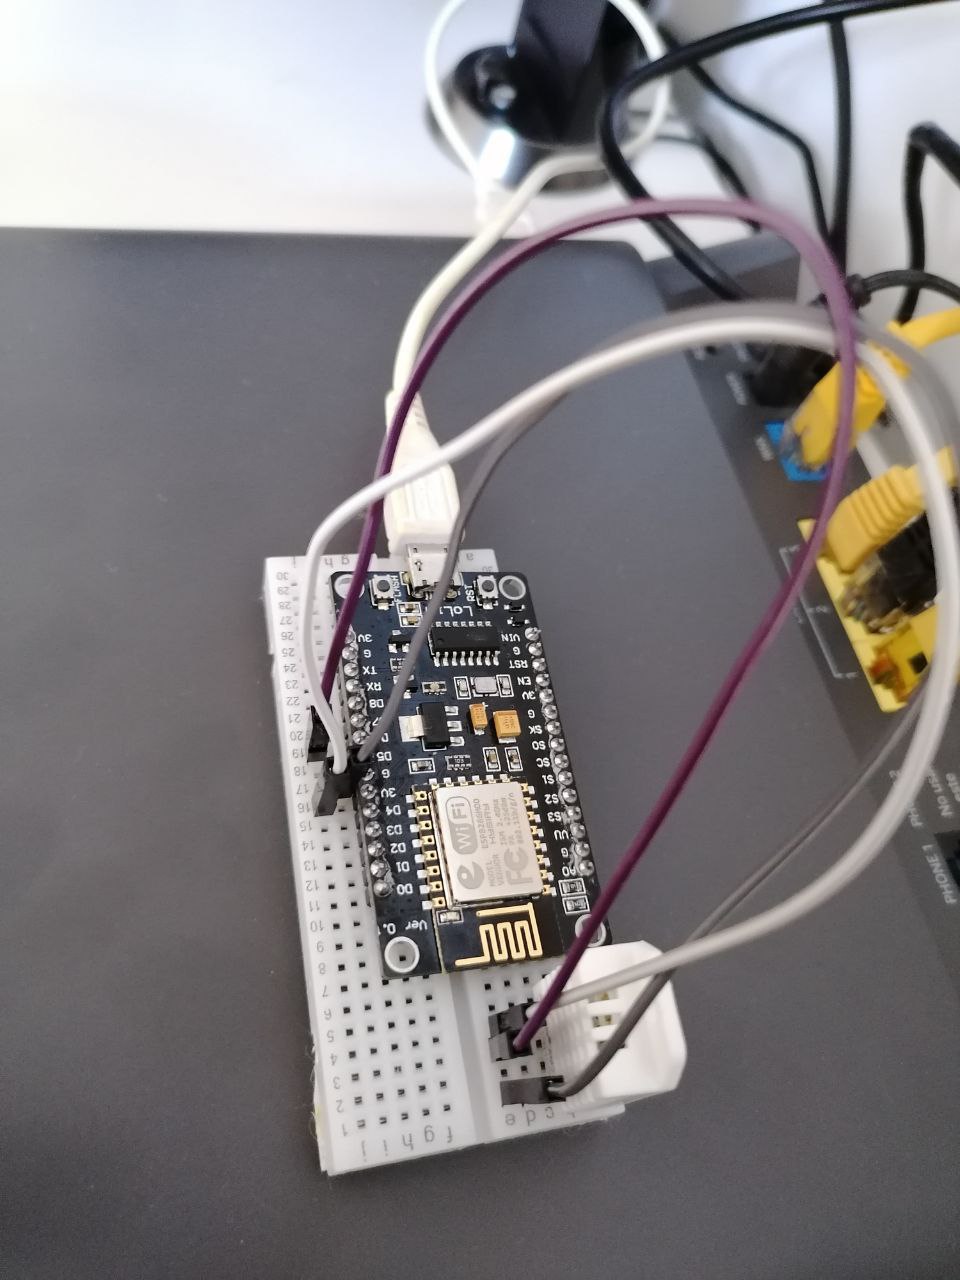
DHT 22 sensor just need three pins:
- First leg: power (3.3V or 5V)
- Second leg: connect it to any I/O port in your board. Change DHTPIN constant in the code.
- Third leg: not used
- Four leg: ground
See https://cdn-learn.adafruit.com/downloads/pdf/dht.pdf for more references. This is my current configuration:
Installation
Replace the following secrets with your custom values:
- ssid/password for you wifi connection
- telegram_token/chatId for your telegram bot config
Update max/min temperature and humidity levels to fit your requirements. Current values are:
const float maxTemp = 26.0; // Max temperature for alerting system
const float minTemp = 18.0; // Min temperature for alerting system
const float maxHum = 85.0;  // Max humidity for alerting system
const float minHum = 50.0;  // Min humidity for alerting system
After that, you can upload weatherstation.ino to your board.
Debugging
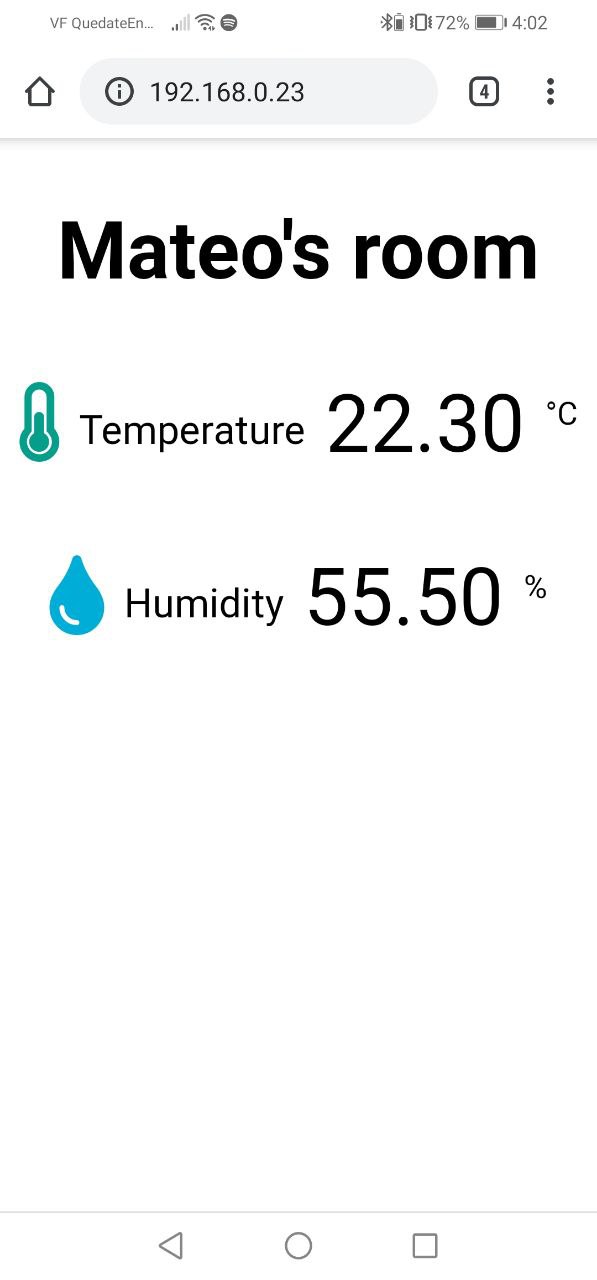
Open your serial monitor (9600 baudios) and wait until you see your board’s private IP on the monitor. Open it on your browser (remember, same wifi network!) and you should see a basic webpage with both temperature and humidity (see imagen below)! Besides, every time any measure is updated, it will be printed out on your serial monitor (as well as any incoming bot command).
Telegram Bot
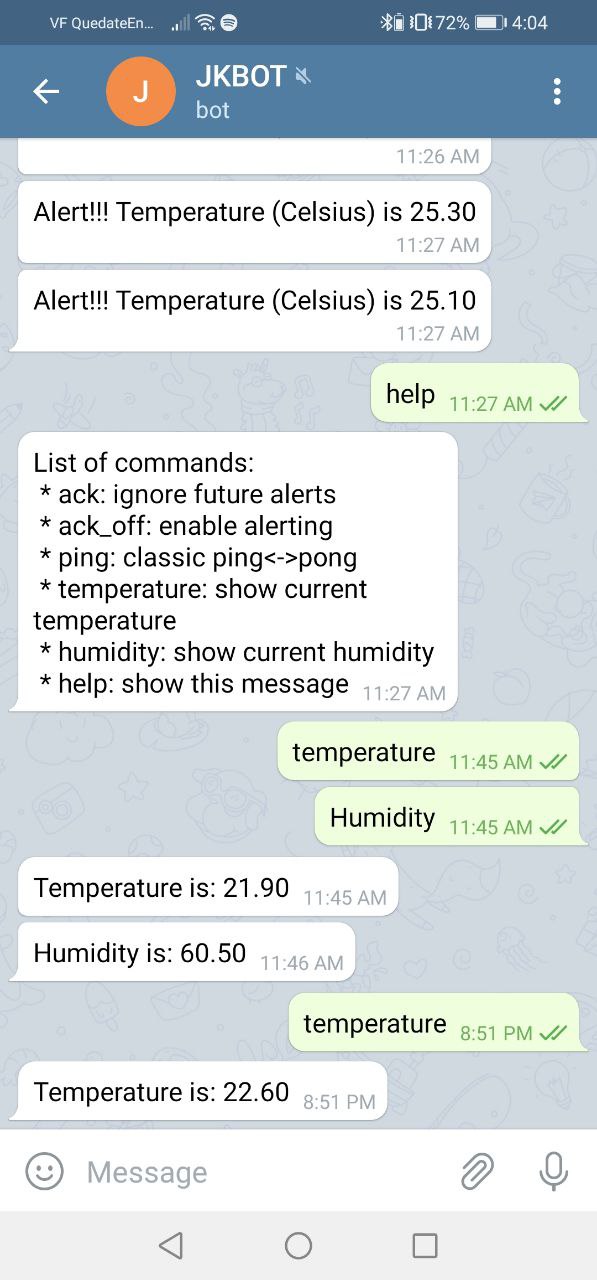
I’ve implemented this list of commands:
- ack: ignore future alerts.
- ack_off: enable alerting (in case you ack before)
- ping: classic ping/pong example.
- temperature: show current temperature in Celsius.
- humidity: show current humidity in percentage.
- help: show this message :)
You can find an example of a chatbot conversation below:
Code
All code can be found at my github here
Does it end here?
No! I have more ideas for stuff to do at home after my son’s arrival, stay tuned!